Sunday, October 28, 2012

makeover for Flyt

I have tons of Ikea FLYT cardboard containers, but I don't like the white raw look they have, not really. I knew someone before thought about decoupage and other similar things, so this idea is not entirely mine... I'm just personalizing with my fabric of choice.

Wanna make one with me?

Then you'll need fabric, glue, trim, a piece of cardboard, scissors, medium brush and a pen. Oh, and of course a FLYT...

You must build your FLYT as always, following instructions. Then you place it on the fabric: tumble it  in every direction, to check if you have enough fabric to cover the thing. Also add 1cm for the borders.


Cut the fabric to cover exactly the sides of your FLYT.


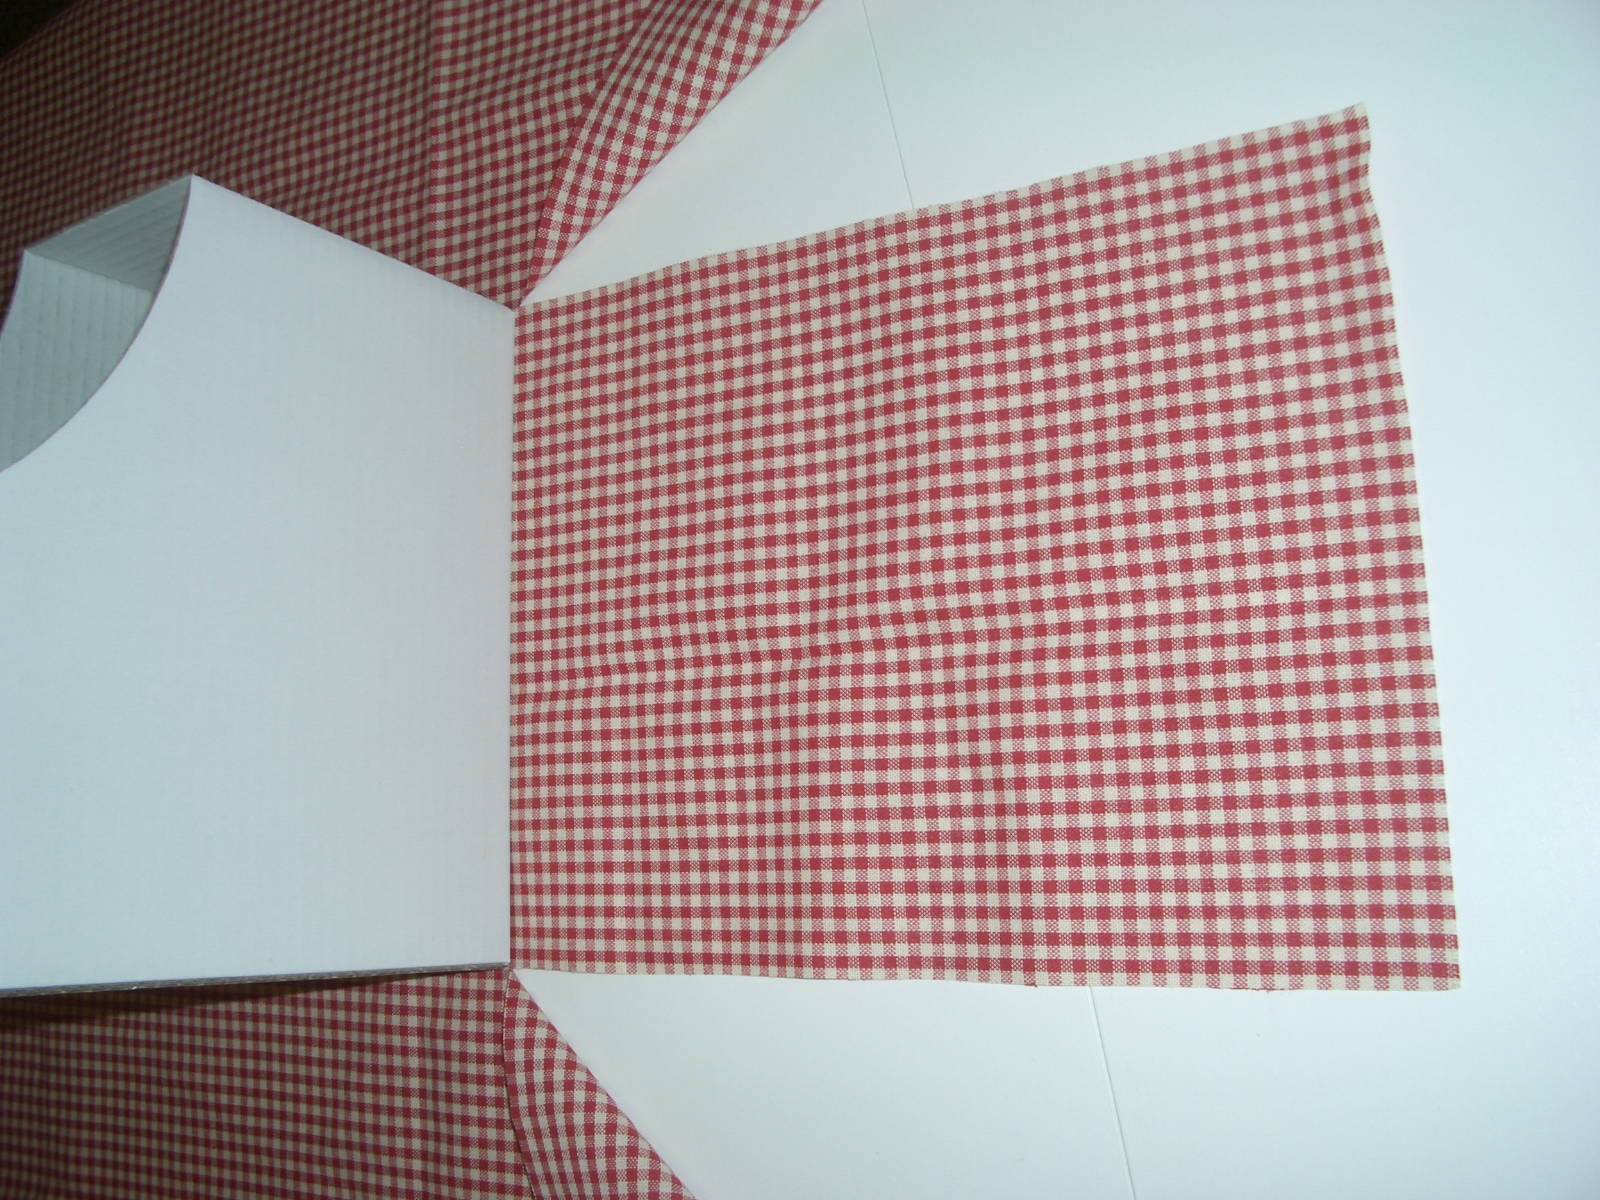
Brush glue on the entire side, just don't glue the borders or the cardboard will bend very un-nicely.


Attach the fabric to the glued side and press with your hands to smooth.


Cut the fabric on top following the shape of your FLYT. You'll end up with a nice scrap for future projects.


Put glue on the fabric (it will be more precise than if you glued the cardboard), and brush it all the way to the border. Be generous, but do not exaggerate.


Flip down to the cardboard the just glued fabric and press with your fingers. You don't need to cut the fabric to follow the curves, it's an oblique cut and it's like working with bias tape.


Make also the other side, in the same manner. Then switch to the smaller back/front (I don't know which is which). Cut the fabric a bit larger on the sides, for the overlapping junctions.


Cut the excess of fabric (always leaving some length for the border) and work exactly as you did for the sides: you just have to also put glue on the fabric that will overlap on the sides.


Do the same thing also on the other side. Now your FLYT is all dressed up.

(sorry, I don't know *why* this image just doesn't flip right...)
While the glue is drying, you can work on the label. I went with an oval form (which I drew using a plastic piece of orange (Smurfettes' courtesy). Cut your cardboard label and write whatever you want to put in the FLYT.


Attach your label on the front (small, big, your choice). Wrap some trim around your FLYT, make a little neat bow and you're finished!


Fill it with whatever you want (I use them for my recipes).


And this fabric covering is quite addictive... you can work this magic on every cardboard surface.


Monday, October 1, 2012

kids' rack for towels - school edition

School has started. I can't believe Smurfette#1 is in her 2nd year... where does the time go?!

This year the teachers want the kids to use fabric towels instead of paper ones, so I duly sent my girl to school with one of her old labelled towels she used in preschool (never throw away those!).

Some days after, the teacher asked for some hooks, 'cause the towels (hanging under the jackets) seemed to never be reached by little hands... (on the other hand, the jackets...)

One of the teachers pointedly watched me saying "we could use a rack, if some of you parents are feeling crafty..." Duly noted. So... wait while processing... and that's the result:

horrible shot of the rack
Bought a wood piece (plain), drilled little holes for little metal hooks, used a brush with green paint, white paint, passed sand paper, added little plastic insects for decoration and stamped little numbers over every hook.

A busy hour, but very satisfying. Teachers' feedback was also positive, so everybody is happy.

perspective view
"worm" detail
"butterfly" detail


What do you think?

Friday, September 7, 2012

another creativity burst

After a very loooong time, I got my inspiration back and I'm writing again. Ok, it's not really writing writing... it's fan fiction... the less 'serious' type of writing... but still...


If you don't know what to read and a book is to much for you, check out this site: pick a fandom (a movie or a tv show) and browse for something you want to read. There are very talented writers there, it's worth a shot.

Sunday, September 2, 2012

instead of a headboard... - part 2

So today I snapped some photos with my phone, ergo... do not expect good quality. I'll make amend when my camera shows up and is properly charged.

This is the "headboard":


Ok, so the bed is a little messy... sorry for that.

This was also my first try-the-piping-thing project, and I totally intend to use this technique again.

The second instance was up and about in no time... experience does count, or so it seems...

I have a project or two still left for the girls' room, and then I'll give you the grand tour, as an "after" of my previous "before". Stay tuned!

Saturday, September 1, 2012

instead of a headboard...

... why not a bolster?

Smurfettes' beds don't have a headboard, and after long and careful thinking I didn't want to make things heavy with something woody, so I decided for a textile solution.

I surfed the net for inspiration, but everything was tufted or overly stuffed, and I wanted something more versatile, not to mention easily washable... you can probably relate with that last requirement if you happen to have kids like mine... artists, that is.

I came across a disquisition on the difference between bolsters and lumbars (I didn't even suspect there was a difference, by the way), and my brain lighted the proverbial light bulb. I stumbled upon this self explanatory picture that helped me in the choice:

found @ The Nester: check that blog, it's worth it

So today I got to work. I bought a roll of foam and cut it accordingly to the suitable size (and before you ask: I opted for a lumbar, not regular, 'cause it's about 17"x36"), bought also the striped cotton and linen heavy fabric, got out of my old stash a beige panama cloth for lining, a roll of purple bias tape and a sisal string (the last two for piping) and busied myself.


See the picture above? I was really busy for the whole afternoon, since I deployed the prototype, which in fact is so good that got promoted to the real thing.

I must clone that for the second bed, but I'm very satisfied of the result. You'll get to see the pictures tomorrow, 'cause the light is just horrible and everything keeps coming out wrong.